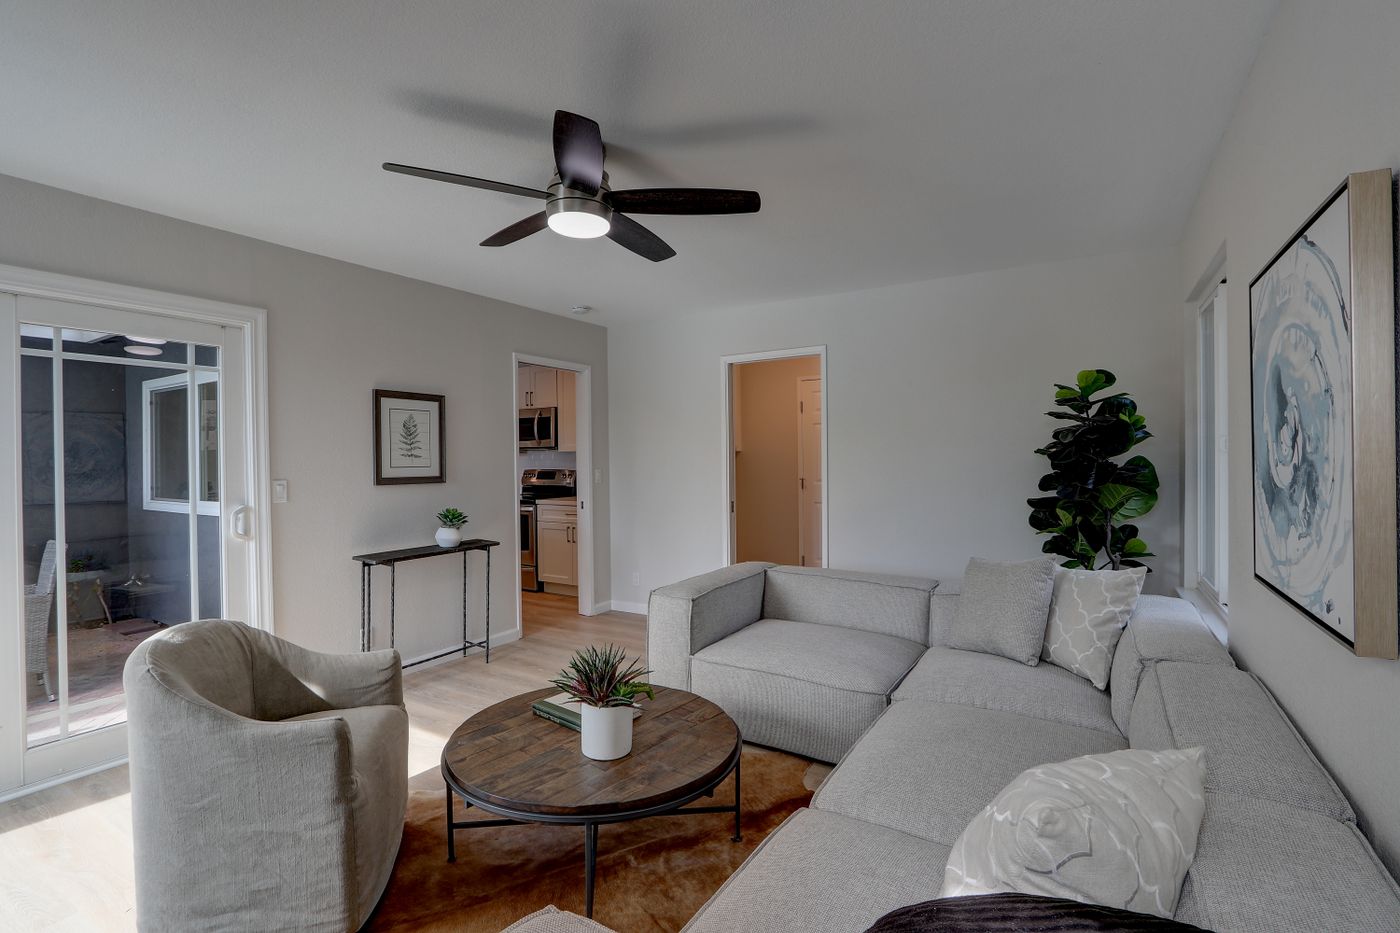
A new chair is almost ready to launch. Then the brief grows: six upholstery colors, two leg finishes, a white-background hero, a rear view and a room scene. Suddenly, “we need a few product photos” has become a production project.
That is usually when the question comes up: should we photograph everything, or build it in 3D?
The useful answer is not that one method looks better. Photography starts with the physical product. Rendering starts with a reusable digital version of it. Which is the better investment depends on what you have today, what changes tomorrow and how many genuinely useful images you need.
Photograph products whose physical character is the story. Consider 3D rendering when accurate models can support repeated finishes, views and updates. Use both when you need the authenticity of a shoot and the consistency of a reusable catalog.
The real difference is what happens after the first image
For a single product, the two processes can lead to a similar-looking result. A photographer places the sample, sets the lights and captures it. A 3D artist prepares the geometry, assigns materials and renders a virtual scene. Both still require a good brief and somebody who knows the product well enough to approve the picture.
The difference becomes clearer when you ask for a change.
With photography, a different finish may mean another physical sample and another session. With a prepared 3D scene, it may mean a material update while the camera stays fixed. But a redesigned chair back still needs new geometry, and a difficult fabric still needs a convincing reference. Rendering removes some physical logistics; it does not remove product knowledge.
Imagine those six upholstery colors and two leg finishes. If all twelve combinations are sold and each needs three views, the brief contains 36 pictures. Before multiplying anything, ask whether all combinations are available and whether every view answers a buying question. You might need twelve main views but only one construction detail shared across the family.
That distinction changes the economics more than choosing a fashionable production method. Start with the actual image brief, not the largest possible export count.
The decision is less about making the first picture—and more about making the next change.
When photography is the better starting point
Photography makes particular sense when the sample is available and its physical character matters: handmade variation, a lived-in texture, the way clothing falls on a person, or a product being used in a campaign. It records the object you put in front of the camera, including details a model would have to reproduce deliberately.
For a small launch, it can also be the simpler route. If you need four images of one item and have no accurate model, commissioning geometry and materials may add preparation without enough reuse to justify it.
The trade-off is coordination. Somebody must obtain the right sample, assemble it, style it and approve the finish. Later changes can reopen those steps. A shoot is not inherently inefficient, but the cost of repeating it deserves a place in the brief.
Look beyond the color name
A label such as “natural oak” or “gray fabric” does not fully describe a surface. Grain direction, weave size, sheen and edge treatment all affect what the shopper sees. Photography captures those properties together; a rendering workflow needs references that communicate them.
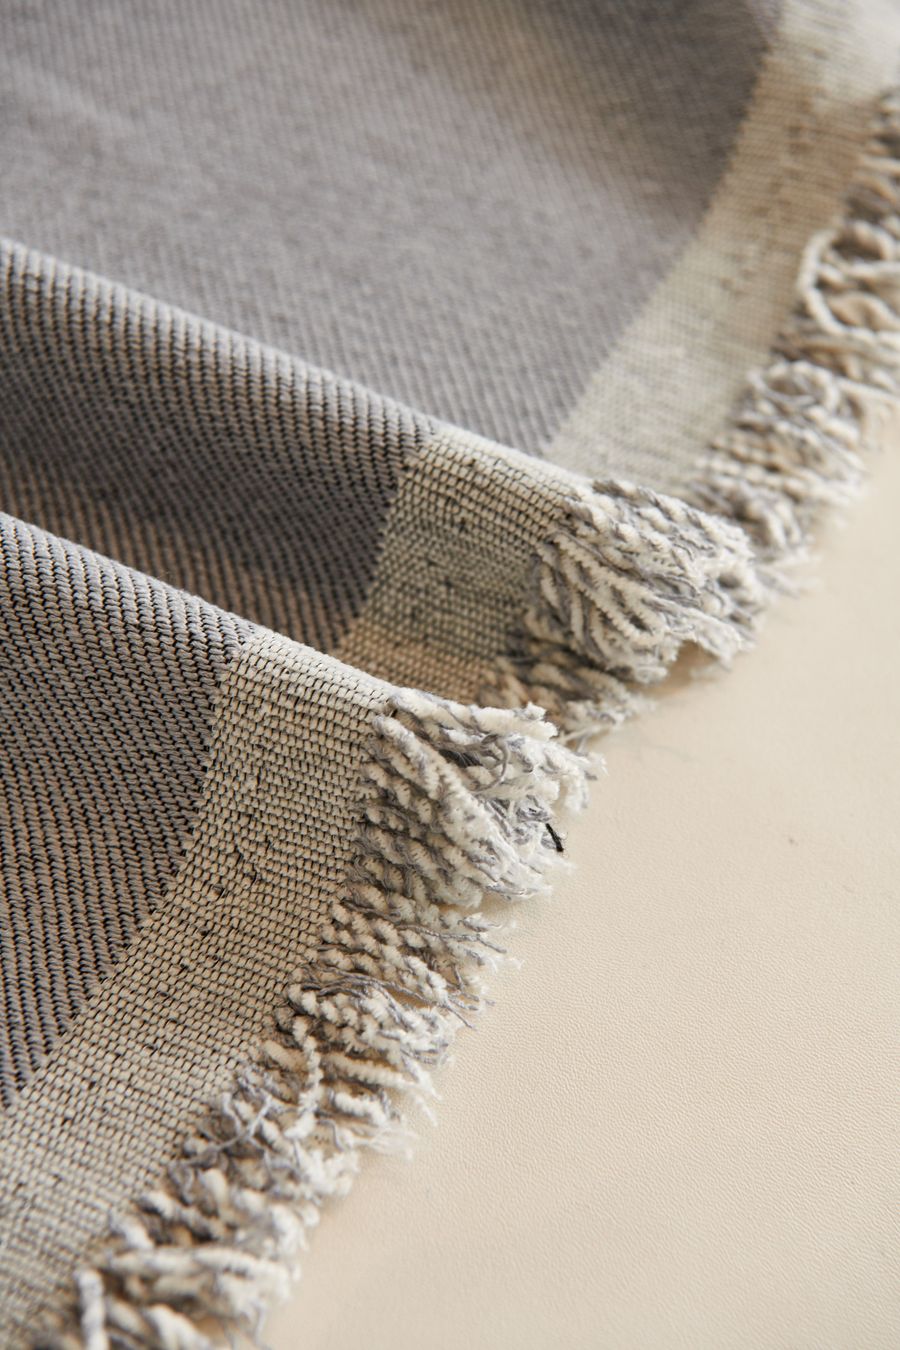

A room photograph can be useful for atmosphere while being a poor neutral color reference. Give the team a shared finish reference so approval does not become a debate between differently lit pictures on different screens.
When a 3D model starts paying for itself
Rendering becomes attractive when the product stays recognizable while the presentation changes repeatedly. The same approved model might support a main image, another finish, a close-up and a new seasonal setting. Camera and lighting choices can be retained instead of rebuilt around another physical sample.
That is particularly relevant for furniture with multiple materials or components. The first model takes effort, but it can become the source for a repeatable catalog rather than a one-off visual.
The word approved matters here. A supplier file with missing textures, incorrect dimensions or inseparable components is not ready for efficient production just because it opens. Resolve those issues before pricing dozens of outputs. Our supplier-model guide explains what to request.
What this looks like in a furniture business
Sofacompany’s experience offers a useful example. In Cylindo’s case study, the brand describes inconsistent angles and lighting in packshots, alongside the logistics of moving furniture for lifestyle shoots. Reusing 3D imagery became a way to address that production problem across customer touchpoints.[1]
You do not need a large catalog to start standardizing. Approve one product, one material reference and one main view. Then find out how reliably that setup handles a second finish or a new angle.
The lesson is not to replace every photograph immediately. It is to identify the work you keep repeating—and establish a reusable source for that work.
Is rendering cheaper? Compare the same finished brief
Price-per-image quotes are easy to misunderstand. One may include model preparation and two correction rounds; another may assume that both are already complete. Put setup, image production and revisions into the same comparison.
Here is a simple worked example. A photography quote has $300 setup plus $20 per accepted image. A rendering quote has $900 preparation plus $5 per accepted image. These are example inputs you can replace with your own quotes.
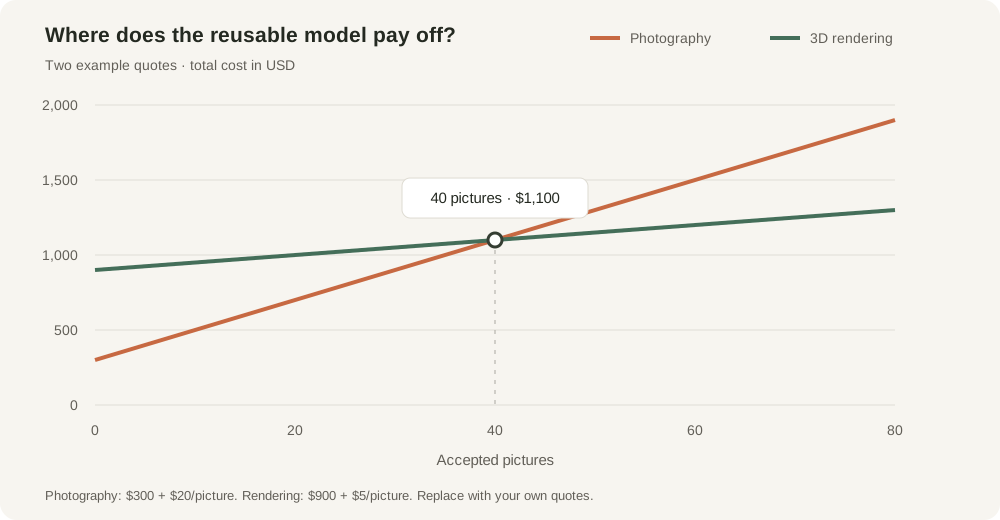
Example calculation: photography = $300 + $20 × images; rendering = $900 + $5 × images.
| Accepted pictures | Photography | 3D rendering |
|---|---|---|
| 10 | $500 | $950 |
| 40 | $1,100 | $1,100 |
| 80 | $1,900 | $1,300 |
At 40 accepted pictures, the two totals meet. Below that, photography is cheaper under these assumptions; above it, the lower per-image rendering cost starts to outweigh preparation.
Now add $500 of model repair. Rendering preparation becomes $1,400 and the crossing point moves to roughly 74 images. If you already have a suitable approved model, the calculation changes in the other direction. The condition of your starting material can matter more than the advertised output price.
Also count pictures, not file formats. A main view exported as JPG and WebP is still one view. Six views in two formats are twelve delivery files—not twelve different creative outputs.
What is actually included in the quote?
The example above compares production fees only. It does not establish a market rate or include every expense below. Ask each provider to mark an item as included, separately priced or not supplied; a blank is not the same as zero.
| Scope item | Photography quote: confirm | Rendering quote: confirm |
|---|---|---|
| Starting product | Sample manufacture, shipping, assembly and return | New modeling or assessment and repair of an existing model |
| Surface preparation | Cleaning, styling and finish samples | Texture capture, material creation and reference matching |
| Scene | Studio, props, location and additional setups | White-background setup versus a separately built lifestyle scene |
| Corrections | Retouching rounds; what triggers a reshoot | Correction rounds; whether geometry changes count as new work |
| Deliverables | Distinct approved views, resolution, crops and encodings | The same output brief; whether transparent backgrounds cost extra |
| Reuse and rights | Permitted channels, territory, duration and retouching rights | Image rights plus editable models, textures and scene-file licenses |
| Later changes | Replacement sample and repeat-session charges | New finish, new view and changed product construction priced separately |
| Other expenses | Taxes, rush fees and your team’s review time | Taxes, rush fees and your team’s review time |
For this comparison, an accepted image means a named product configuration in an agreed view that the designated reviewer has approved. A new crop is not automatically a new view; a changed chair back is not merely a color revision. Put those distinctions in the quote before commissioning the batch.
Source-file delivery also needs an explicit agreement. Receiving a rendered JPG does not mean receiving an editable scene, and receiving a scene does not automatically transfer licenses for third-party textures or props.
Ask about the update, not only the launch
Before choosing a provider, ask what it would cost to add one finish next month and change a construction detail next quarter. Include sample transport, material preparation, source corrections and internal approval time. Clarify whether you receive reusable source files or only finished pictures.
Use the cost worksheet to collect comparable numbers. The most useful quote is the one that tells you what reaching an accepted result will involve, including what happens when something needs changing.
You may not need to choose only one
A practical furniture workflow can combine methods: photograph the real material, retain an accurate model for consistent catalog angles and commission a lifestyle shoot when people, styling or a particular location are central to the campaign.
Sayduck’s virtual-photography guide similarly distinguishes white-background outputs from more involved lifestyle scenes, rather than treating every image as the same production task.[2] That is a useful way to divide your own brief.
Keep existing photographs that still represent the product accurately. Introduce rendering where it solves a repeatable problem. The goal is one coherent customer-facing image set, not a catalog that proves allegiance to one technique.
| What you need next | A sensible route |
|---|---|
| A few pictures of one available sample | Start with a focused shoot |
| Consistent views across approved finishes | Test a reusable rendering setup |
| Human interaction or a distinctive campaign setting | Plan photography or a scoped hybrid |
| Product images from an existing model | Confirm materials and prepare a small render brief |
| Missing backside, dimensions or finish evidence | Obtain the product references first |
Whatever the method, the customer should see the correct merchandise. Keep the variant-to-image mapping alongside the pictures so a polished walnut image does not end up attached to the oak SKU.
Start with one product and one meaningful change
Instead of committing the whole catalog, select a representative product with a detail that is genuinely difficult to show. Request a main view, a close-up and one finish update. Review them against the same brief and references.
Look at what it takes to reach approval. Can the finish change while the camera and unchanged components stay consistent? Are the final downloads useful at storefront size? Can another person identify which SKU each picture belongs to?
Those answers give you a better basis for expanding than a perfect demonstration of an unrelated product.
A repeatable pilot: one chair, two finishes, three review views
Use one physical chair and its matching model, at the same product revision. Capture a front three-quarter view and a close-up of a difficult seam or joint, then request one approved finish change. This is a pilot protocol you can run with a supplier—not a claim that a Rendora customer trial has already been completed.
Before production, collect the dimensions, front and rear references, a neutral-light material reference, the two sellable finish specifications and permission to use the supplied files. Record which references establish shape and which establish surface appearance. Missing evidence should become an open question, not an artist’s silent assumption.
| Review view | What to hold constant | What the reviewer should inspect |
|---|---|---|
| Whole product: photograph beside render | Product revision, comparable framing, background and output size | Silhouette, included parts, proportions and visible construction |
| Detail: photograph beside render | The same seam or joint and a comparable crop | Weave scale, grain direction, edge construction and highlight behavior |
| Second finish: before beside after | Camera, lighting and every unchanged component | Only the requested finish changes; the output maps to the correct SKU |
A pleasing overall impression is not enough. If the render has the wrong seam or leg profile, record the discrepancy against a specific reference. If color is disputed, first check the light, reference capture and viewing conditions; an ordinary side-by-side browser display is not a colorimetric measurement.
Keep the original delivery, the correction request and the revised file. For each correction, record whether the cause was missing reference information, incorrect geometry, material interpretation or a changed brief. That distinction tells you whether the next product needs a better intake process or more production work.
Download the pilot review register to record the source revision, evidence, correction and approval for each view. Reopen the final files, check them at the intended storefront size and verify SKU mapping before signing off. Leave unresolved checks open rather than marking the whole set approved.
Once approved pictures exist, keep the handoff simple. The Rendora ecommerce workflow currently packages supported product photos or aligned component layers into JPG/WebP files with SKU mapping. For a 3D-rendering project, prepare the required rendered views first, then review the resulting image package before upload.
Scope one product before you scale the catalog.
Use the cost worksheet to compare the same brief, then follow the model-to-image guide to plan the delivery.
Download the cost worksheet Read the image-production guide →Questions before you commission the work
Is 3D rendering always cheaper than photography?
No. It has preparation costs that need enough useful reuse to pay off. Compare equivalent briefs, and include repairs and correction rounds in the quote.
Do I need a physical product for a rendering project?
Not always, but you still need reliable product evidence. Approved geometry, measurements and material references provide a stronger foundation than a single photograph with unseen details left to interpretation.
Can rendering replace every product photograph?
It can replace some recurring catalog work. Material references, products in use and campaigns may still benefit from photography. Choose by the job each image must do.
What if I already have a 3D model?
Have the supplier assess its geometry, material dependencies and suitability for your required views. A model for interactive web viewing may need different preparation from one used for a close-up marketing image.
What should I ask for in a pilot?
One representative product, a main view, a difficult detail and one specific change. Agree the acceptance criteria and source-file handoff before expanding.
References
[1] Sofacompany: creating a consistent omnichannel product experience — Cylindo.
[2] How virtual photography benefits ecommerce — Sayduck.
About this guide
Rendora publishes practical guides to product configuration and asset delivery. This guide combines cited industry examples, an illustrative cost calculation and a supplier-review protocol. The pilot described here is a method to run, not a completed customer trial.