You select natural oak, but the main picture stays walnut. Or the main picture changes correctly while the rest of the gallery still shows every finish. These symptoms can look similar while requiring different fixes.
Uploading a product image and assigning an image to a variant are separate steps. If clicking a color still shows the wrong item, check the variant’s assigned image first, then the behavior of your storefront’s gallery. Renaming a file is not a substitute for assigning it.
This guide addresses the merchant task: you have approved pictures and want shoppers to see the correct item. It does not require programming, and it does not assume that your theme or an installed app offers the same features as another store.
Know what Shopify assigns natively
Shopify’s current help documentation says each variant supports one assigned image. Other related images can remain in the product gallery. Assigning one image does not, by itself, create an automatically filtered gallery containing every picture for that variant.[1]
| You want to do this | What to verify |
|---|---|
| Show the right main image when a color is selected | Assign the correct image to each relevant variant |
| Show several detail images for a color | Put them in the product gallery and check navigation |
| Hide every other color’s images automatically | Confirm support in your theme or selected solution |
| Add a rotating 3D model | Treat it as product media, with separate display requirements |
The distinction matters when comparing software. An app demonstration showing filtered galleries is not evidence that every Shopify theme does the same thing without setup.
Prepare a mapping before opening the admin
Create a short register with the product, option combination, SKU and intended assigned image. Use the names that already exist in your catalog. If several sizes share the same visible color, decide deliberately whether the same image is appropriate; do not let a bulk operation make that decision accidentally.
Download the variant test sheet. Include similar-looking finishes, an unavailable choice if relevant, and any size whose shape visibly differs. Those are more revealing tests than selecting only obviously different colors.
If you still need to produce the pictures, use the consistent variant image guide. Fix color and identity errors before uploading them to the store.
Assign images to existing variants
In the desktop admin, open Products, choose the product and find its Variants section. Select the image control for the variant, choose or upload the matching picture, confirm the choice and save. These steps follow Shopify’s current help page; interface details may change.[1]
Work from the register rather than memory. After each group, compare the selected variant with the actual picture. Two warm wood finishes can be easy to mix up, especially when thumbnails are small.
Keep supplementary detail pictures in a useful order. A fabric close-up should not interrupt an unrelated product’s dimensions illustration. Gallery order and variant assignment solve different problems and both need review.
Test the storefront, not only the admin
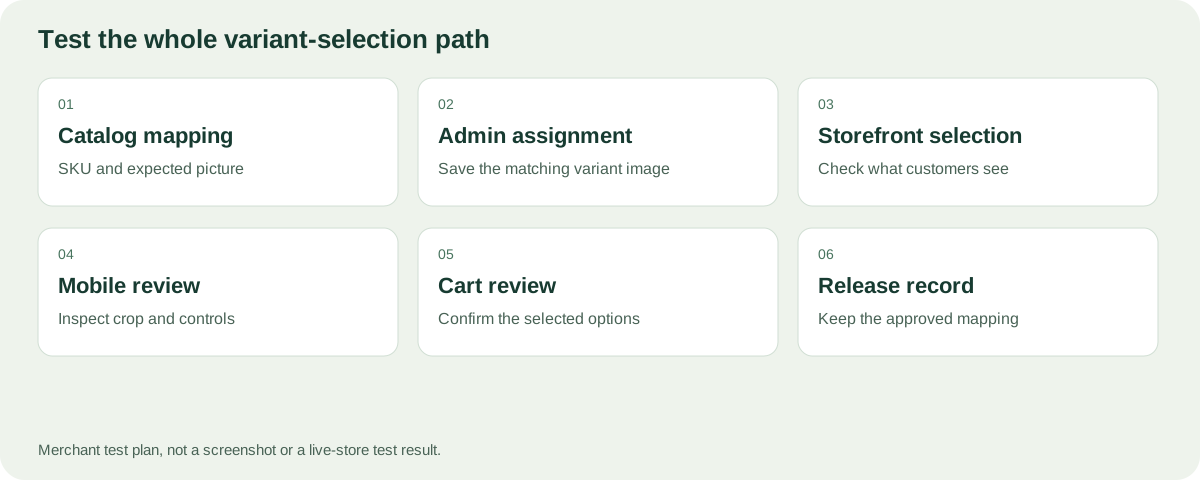
Follow the selected item from catalog record to storefront and cart.
Open the draft or preview storefront in a fresh browsing session. Choose one option at a time, then combinations of options. Check the selected label, displayed image, price where relevant and availability message.
Add one item to a test cart and inspect its option labels. A correct image should not conceal a wrong order selection. This is a recommended merchant check, not a claim that every theme shows identical cart media.
Repeat on a phone. Make sure the selection controls are usable, the image is not cropped misleadingly and an unavailable option cannot be mistaken for an orderable item. If you use a gallery or swatch app, also test the interactions it changes.
Worked example: two colors and three sizes
Imagine a product available in charcoal or natural fabric, each in small, medium and large. The six option combinations need deliberate image mapping. If all sizes genuinely have the same appearance for the required picture, you may decide to reuse a color image. If the large size has visibly different proportions or construction, supply an appropriate representation instead.
Create six rows in the test sheet. For each row, record the expected color, size and image. Test the default page state, then switch from charcoal large to natural small, and then back again. This sequence can reveal a selection or gallery issue that is not apparent when testing each color only once.
Do not stop at “the first picture changed.” Check whether the currently selected size still belongs to the intended combination and whether the cart labels match. A shopper should not have to infer the ordered item from an attractive thumbnail.
Follow the fault to the right layer
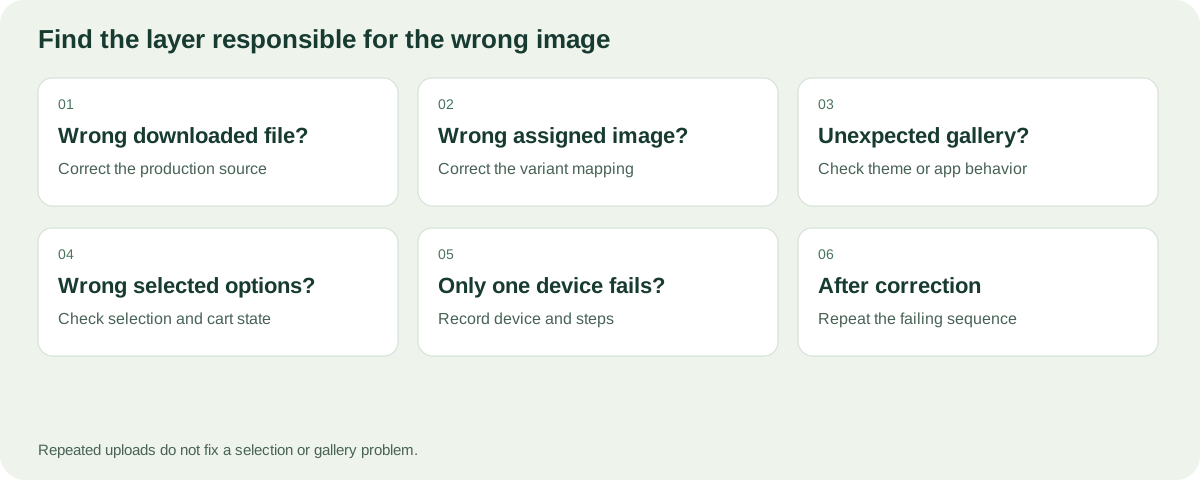
Start with the downloaded image. If it already shows the wrong finish, fix the production package. If the file is correct but the variant’s assigned image is wrong, correct the admin mapping. If the assignment is right but the gallery is not filtering, check whether filtering was ever part of the theme or app setup.
Finally, inspect the selected option state. If the displayed image is right but the cart contains another option, a picture change will not solve the ordering issue. Record the sequence that caused it and involve the person responsible for the theme or selection integration.
This separation prevents a common waste of effort: repeatedly uploading identical files while the problem sits in gallery behavior. It also makes support requests easier to reproduce and resolve.
Check these edge cases before launch
| Situation | What to verify |
|---|---|
| First visit with no interaction | Default selection and first image tell the same story |
| Switch between similar finishes | Image and option labels change together |
| Change size after selecting color | Final combination still matches the intended item |
| Open a copied product link | The page state is understandable and accurate |
| Use a mobile gallery | Image swipe and option controls do not become confused |
| Return from the cart | Previously selected information is not misleading |
Treat these as a small regression set after theme or gallery updates. You do not need to retest every conceivable path each time, but the combinations that have previously failed should stay on the list.
Hand off a clean change request
For an internal team or external support provider, include the product URL, affected SKU, exact selection sequence and the observed result. Add a picture of the issue only if it makes the difference clear. State whether the defect occurs in the current live theme, a draft theme or both.
Keep this separate from access details. An example can usually be explained without sharing customer data, credentials or private order records. Once corrected, rerun the same sequence and update the test sheet so there is an actual acceptance record rather than only a “fixed” message.
Common symptoms and first checks
| Symptom | First check | Next action |
|---|---|---|
| Color changes but main picture stays wrong | Variant image assignment | Reassign and save; retest the storefront |
| Main picture changes, but all colors remain in gallery | Expected gallery behavior | Confirm whether filtering is supported |
| Correct picture, wrong size or finish in cart | Selected options and cart labels | Review variant selection; do not fix only the image |
| Issue occurs only in one theme preview | Theme settings or custom behavior | Ask the theme provider with a reproducible example |
| Issue started after installing a gallery app | App behavior and settings | Test safely in a draft theme and contact its support |
| Downloaded picture itself is wrong | Source package and SKU register | Correct upstream; reuploading will not fix the file |
Give support an exact example: product name, selected options, expected picture, observed picture, device and whether the problem happens in a fresh session. Do not send credentials or access tokens in a screenshot.
Do not confuse images with interactive 3D
Shopify treats images, videos and 3D models as distinct product media, with theme support required for videos and models.[2] A JPG cannot become rotatable because its filename contains “3D.” Likewise, uploading a model is not the same as creating a rules-based configurator.
If you are choosing between those experiences, read the viewer versus configurator comparison. Start with the simplest feature that answers the customer’s buying question.
What a Rendora package does—and does not—replace
Before changing a live theme or disabling an app, preserve the current configuration and use the merchant’s safe preview or duplicate-theme process. Check the provider’s instructions for testing its integration. A quick gallery fix is not worth disturbing a working purchase flow without a recovery plan.
The ecommerce tool can prepare a downloadable JPG/WebP image package with SKU mapping information from supported approved sources. Use the merchant SKU to reconcile those files with the store.
That package is not automatically a Shopify import file, theme integration or live listing update. The current path does not assign images inside your store. You still need to upload, associate and review the files. Use the image release checklist before switching the listing live.
FAQs
Can one variant have multiple assigned images?
Native assignment is one image per variant under the current help documentation. Additional gallery presentation requires checking the available theme or solution behavior.
Does changing alt text assign a picture to a variant?
Not in the native assignment workflow described here. Some custom solutions use naming conventions, but do not assume such conventions exist in your store.
Why does the picture look correct in admin but not on the storefront?
Assignment is only one layer. The theme, gallery settings, installed apps or an older preview can affect what you see. Reproduce the issue with specific options in a fresh session.
Should I buy a configurator to fix one wrong image?
Not as the first step. Check the variant mapping and gallery behavior. A full configurator solves a broader problem than a missing image assignment.
Sources and notes
[1] Shopify: Adding images to product variants. Native assignment limits and desktop steps checked October 16, 2026.
[2] Shopify: Product media types. Check the documentation and your current theme before adding interactive media.
About this guide
Rendora publishes practical guides to product configuration and asset delivery. This guide draws on the linked documentation and editorial analysis. Worked examples and review protocols are identified in the text.